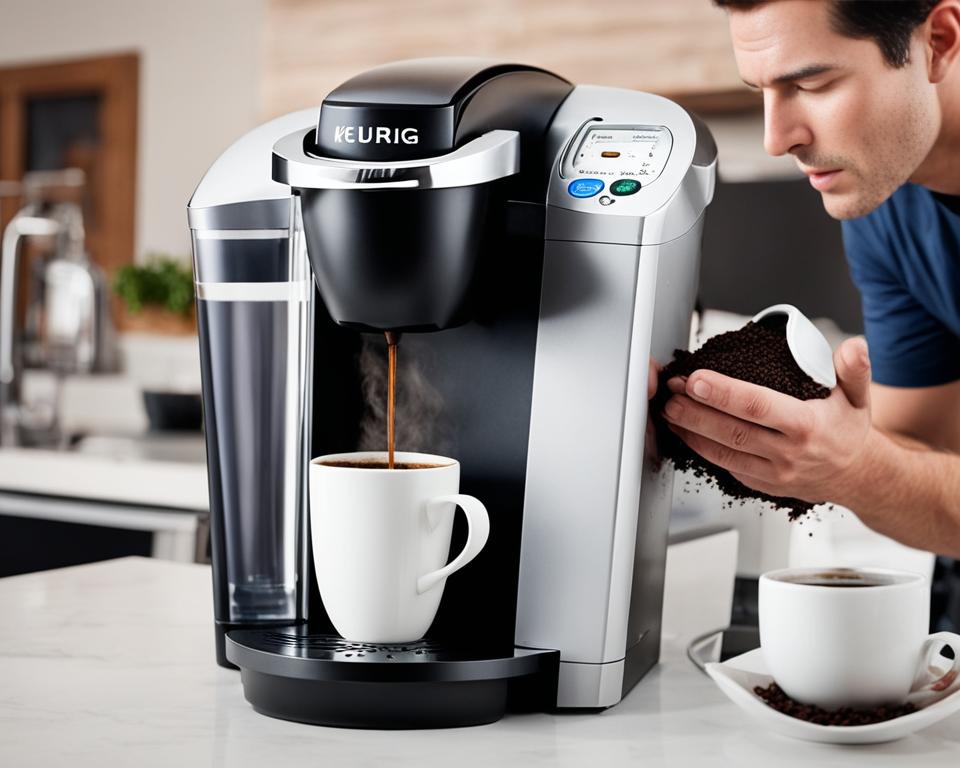
The Keurig coffee maker is a popular choice for many coffee lovers due to its simplicity and convenience. However, like any appliance, it can sometimes encounter issues that may disrupt your coffee routine. In this section, we will provide expert troubleshooting tips to help you solve common problems with your Keurig machine. From resolving issues with the machine not working or brewing properly to troubleshooting issues with power and leaks, these tips will help you get your Keurig back up and running smoothly.
Key Takeaways:
- Learn how to resolve common Keurig issues and get your coffee maker back in working order.
- Find troubleshooting tips for problems such as the Keurig not working, not brewing, or not turning on.
- Discover solutions for Keurig issues like descaling, leaking, flashing lights, and no power.
- Get step-by-step instructions for cleaning and troubleshooting your Keurig machine.
- Explore model-specific troubleshooting guides for popular Keurig models.
How to Fix a Clogged Keurig
When your Keurig machine is clogged, it can prevent your coffee from brewing at the optimal temperature. To ensure a piping hot cup of joe, it’s crucial to address this issue. Here’s a step-by-step guide to fix a clogged Keurig:
- Clean the External Removable Parts: Begin by unplugging your Keurig and allowing it to cool. Remove the water reservoir, drip tray, and pod holder. Wash them with hot water and liquid dish soap to remove any buildup or debris.
- Perform Routine Cleaning: Regular maintenance is key to preventing clogs. Clean the needle that punctures the K-Cup by using a paperclip or Keurig’s maintenance accessory. Gently insert it into the needle to remove any blockages. Also, wipe down the needle and the area around it with a damp cloth to ensure optimal brewing performance.
- Deep Clean for Stubborn Clogs: If your Keurig has been in use for more than six months or you’re experiencing persistent clogs, it’s time for a thorough cleaning. In this case, follow the manufacturer’s instructions to disassemble the machine and deep clean each component. Pay extra attention to the needle, valve, and internal parts. Regularly descale your Keurig to prevent mineral buildup and clogs.
By following these cleaning and maintenance tips, you can unclog your Keurig and enjoy hot and delicious coffee once again.
| Common Causes of Clogged Keurig | Solutions |
|---|---|
| Mineral deposits from hard water | Regularly descale your Keurig using a descaling solution or a mixture of vinegar and water. |
| Residue build-up from coffee oils and particles | Clean the needle and surrounding area regularly. Perform routine maintenance to prevent clogs. |
| Improper handling or storage of the machine | Handle your Keurig with care and store it in a clean and dry place when not in use. |
How to Reset Your Keurig
If you’re experiencing difficulties with resetting your Keurig coffee maker, there could be a few possible causes. It’s important to first ensure that your Keurig is properly assembled and that all parts are clean and undamaged. Sometimes, issues with resetting can arise due to assembly problems or debris obstructing the machine’s functionality.
If you’ve confirmed that your Keurig is correctly assembled and clean, but the issue persists, it may be necessary to seek assistance from Keurig customer support. Their knowledgeable team can provide further guidance and troubleshooting tips tailored to your specific situation.
To perform a reset on your Keurig, follow these steps:
- Start by turning off the brewer.
- Unplug the machine and wait a few minutes.
- Remove the water reservoir from the Keurig.
- Plug the machine back in and reconnect the water reservoir.
Resetting your Keurig can help resolve various issues, such as unresponsive buttons or error messages. However, if the problem persists after attempting a reset, don’t hesitate to reach out to Keurig customer support for further assistance.
For additional troubleshooting tips and solutions for common Keurig issues, continue reading the next section.
Common Keurig Coffee Maker Problems and Solutions
Keurig coffee makers are known for their convenience and simplicity, but like any machine, they can encounter issues from time to time. In this section, we will address some of the most common problems that Keurig owners may face and provide troubleshooting tips and solutions to help you resolve them.
1. Keurig turning on/off on its own
If your Keurig is turning on or off without any input from you, it can be frustrating. One possible cause could be a faulty power button. To troubleshoot this, try cleaning the power button with a soft cloth or turning off the machine and unplugging it for a few minutes before plugging it back in. If the issue persists, it may be necessary to contact Keurig customer support for further assistance.
2. Keurig leaking
Leaking is another common issue that Keurig users may encounter. If your Keurig is leaking water, check the water reservoir to ensure it is properly seated and not overfilled. Inspect the gasket seal on the bottom of the water reservoir for any damage or debris. Additionally, make sure the removable drip tray is correctly positioned and not overflowing. If the issue continues, you may need to clean the machine using Keurig’s recommended descaling method or reach out to Keurig support for further guidance.
3. Keurig brewing too little coffee
If your Keurig is brewing less coffee than usual, there are a few potential causes. The first step is to check the water level in the reservoir and ensure that it is filled to the appropriate amount for your desired cup size. It is also essential to clean the exit needle, which could be partially clogged with coffee grounds. If the problem persists, try using a different K-Cup or contacting Keurig customer support for assistance.
4. Keurig coffee taste issues
If you notice a change in the taste of your Keurig-brewed coffee, there are various factors to consider. First, ensure that your Keurig is regularly cleaned and descaled to prevent build-up that could affect the taste. Additionally, try using filtered water to eliminate any unwanted flavors or odors that may be present in your tap water. Experimenting with different K-Cup flavors or brands can also help pinpoint the issue and improve the overall taste of your coffee.
5. Keurig “Add More Water” message
Seeing the “Add More Water” message on your Keurig display can be confusing, especially if there is enough water in the reservoir. If you encounter this error message, try removing the water reservoir and reseating it firmly in place. Ensure that the water level is above the minimum fill line. If the problem persists, you can try cleaning the water reservoir and the machine’s internal water sensor. If all else fails, Keurig customer support can provide further guidance.
6. Keurig not turning on
If your Keurig is not turning on, there are a few troubleshooting steps you can take. Start by checking if the machine is properly plugged into a functioning power outlet. If it is, try pressing and holding the power button for a few seconds to see if it responds. You can also try resetting the machine by unplugging it for a few minutes and then plugging it back in. If the issue persists, reaching out to Keurig customer support is recommended.
7. Keurig making weird noises
Unusual noises coming from your Keurig can indicate underlying issues that need addressing. If you hear strange sounds like grinding, squealing, or hissing, it could be a sign of a malfunctioning part. Start by cleaning and inspecting the exit needle, as it could be clogged or damaged. If the noise continues, it is best to contact Keurig support for further assistance or to schedule repairs if necessary.
8. Keurig not heating
If your Keurig is not heating the water properly, it can result in lukewarm or cold coffee. Begin by checking if the machine is properly plugged in and that the power outlet is functioning. Ensure that the water reservoir is correctly seated and filled to the appropriate level. If the issue persists, try descaling the machine to remove any mineral build-up that could be hindering the heating process. If none of these steps resolve the problem, Keurig customer support can provide additional guidance.
By following these troubleshooting tips, you can address common Keurig coffee maker problems and enjoy a seamless brewing experience. If you encounter more complex issues or need further assistance, don’t hesitate to reach out to Keurig customer support for expert help.
Model-Specific Troubleshooting Guides
Keurig offers a range of coffee maker models, each with its own unique features and functions. In this section, we will provide troubleshooting guides tailored specifically to popular Keurig models, including the K-Mini, K-Supreme Plus, K-Slim, K-Cafe, and 2.0. Whether you’re facing issues with brewing, power, or other functionalities, these guides will help you diagnose and resolve problems with your specific Keurig model.
Keurig K-Mini
The Keurig K-Mini is a compact and portable coffee maker, perfect for small spaces and on-the-go brewing. If you’re experiencing any issues with your K-Mini, refer to the troubleshooting guide below:
| Issue | Possible Solution |
|---|---|
| The machine won’t power on | Check that the power cord is securely connected to an outlet. If necessary, try plugging it into a different outlet. Ensure that the power button is pressed firmly. |
| Water not dispensing or dispensing slowly | Make sure the water reservoir is properly filled and seated. Clean the needles and ensure that there are no blockages. Descaling the machine may also help improve water flow. |
| Inconsistent brewing temperature | Ensure that the machine has had enough time to heat up before brewing. Run a cleaning cycle to remove any mineral build-up that may affect temperature consistency. |
| Weak or watery coffee | Verify that you are using the recommended amount of coffee grounds for your desired strength. Consider using a finer grind size or adjusting the water-to-coffee ratio. |
Keurig K-Supreme Plus
The Keurig K-Supreme Plus offers customizable brewing options, including strength control and temperature settings. If you’re encountering issues with your K-Supreme Plus, refer to the troubleshooting guide below:
| Issue | Possible Solution |
|---|---|
| The machine is not brewing | Check that the water reservoir is properly filled and seated. Ensure that the brewer lid is closed securely and that the power button is pressed. If using a My K-Cup® Reusable Coffee Filter, make sure it is inserted correctly. |
| Temperature not hot enough | Verify that the temperature setting is adjusted to the desired level. Check that the machine has had enough time to heat up before brewing. |
| Unusual noises during brewing | Ensure that the machine is on a stable and level surface. If the noise persists, contact Keurig customer support for further assistance. |
| Leaking or overflowing | Check that the brewer is positioned correctly on the drip tray and that the drip tray is not full or blocked. Clean and inspect the water reservoir for any cracks or damage. |
Keurig K-Slim
The Keurig K-Slim is designed for those who value space-saving convenience, ideal for fitting in tight kitchen spaces. If you’re facing any issues with your K-Slim, use the troubleshooting guide below:
| Issue | Possible Solution |
|---|---|
| The machine won’t brew | Check that the water reservoir is properly filled and seated. Ensure that the brew button is pressed and that the power button is on. Clean the needles if necessary. |
| “Add Water” message despite sufficient water | Remove and reseat the water reservoir. Check that the float mechanism in the reservoir is moving freely. Clean the float and the reservoir connector if needed. |
| Slow brewing or incomplete cup | Descaling the machine can help improve water flow and resolve this issue. Also, check that the exit needle is clear and clean. |
| Uneven coffee extraction | Ensure that the K-Slim is resting on a level surface. Adjust the brew volume setting if needed. Use the recommended amount of coffee grounds for your desired taste. |
Keurig K-Cafe
The Keurig K-Cafe is designed for those who enjoy lattes, cappuccinos, and other specialty coffee beverages. If you’re experiencing any issues with your K-Cafe, refer to the troubleshooting guide below:
| Issue | Possible Solution |
|---|---|
| No froth or low froth in milk | Ensure that the frother is properly attached and seated. Use fresh, cold milk for best results. Adjust the froth setting to your preference. |
| Dripping after brewing | Check that the plastic funnel is properly aligned and seated with the pod holder. Clean the pod holder and funnel to ensure they are free from coffee grounds or debris. |
| Temperature not hot enough | Verify that the temperature setting is adjusted to the desired level. Allow the machine sufficient time to heat up before brewing. |
| Machine not turning on | Check that the power cord is properly connected to an outlet and that the power button is pressed. Try plugging the machine into a different outlet if necessary. |
Keurig 2.0
The Keurig 2.0 offers advanced brewing features, including the ability to brew a full carafe of coffee. If you’re encountering any issues with your Keurig 2.0, use the troubleshooting guide below:
| Issue | Possible Solution |
|---|---|
| The machine is not brewing | Ensure that the brewer lid is closed securely and that the power button is pressed. Check that the water reservoir is properly filled and seated. Clean the needles if necessary. |
| Coffee tastes weak or watered down | Verify that you are using the correct K-Cup® pod size for the selected brew strength and serving size. Adjust the brew strength and try using a smaller brew size if needed. |
| Display error messages | Refer to the user manual for specific error codes and follow the recommended troubleshooting steps. Contact Keurig customer support for further assistance if the issue persists. |
| Leaking from the bottom | Check that the water reservoir is properly seated and that the gasket and valves are clean and undamaged. Clean the drip tray and check for blockages. |

Now armed with the model-specific troubleshooting guides, you can confidently address any issues that may arise with your Keurig coffee maker. By following these troubleshooting steps, you’ll be able to diagnose and resolve common problems, ensuring that your Keurig consistently delivers delicious coffee with every brew.
Key Advice to Conclude
As we wrap up this article on Keurig troubleshooting tips, it’s important to consider a few key points to ensure a smooth coffee brewing experience.
Check Your Keurig Warranty
Before attempting any repairs or replacements, always check your Keurig warranty. A valid warranty can provide you with coverage and assistance for any issues you may encounter with your machine.
Contact Keurig Customer Care
If you’re facing complex issues or require technical support, don’t hesitate to reach out to Keurig customer care. Their knowledgeable representatives can guide you through troubleshooting steps and provide valuable solutions tailored to your specific situation.
Repair vs. Replacement
When deciding whether to repair or replace your Keurig coffee maker, take into account the nature of the issue and the cost-effectiveness of the solution. Simple repairs, such as replacing a part or cleaning, are often more feasible than replacing the entire machine. However, if the problem is major or recurrent, investing in a new Keurig may be a more practical option.

Consider Nespresso Coffee Makers
If you’re exploring alternative options to Keurig, consider Nespresso coffee makers. Nespresso offers a range of high-quality machines that provide a unique coffee brewing experience. Their sleek designs and variety of coffee flavors make them a popular choice among coffee enthusiasts.
Remember that the decision ultimately depends on your personal preferences and circumstances, so make sure to evaluate all the available options before making a purchase.
Thank you for reading this comprehensive guide on Keurig troubleshooting tips. We hope these insights and advice have helped you find solutions to your Keurig coffee maker issues. If you have any additional tips or experiences to share, please leave a comment below and help others facing similar challenges.
Additional Tips for Optimal Keurig Performance
In order to maintain optimal performance and ensure the longevity of your Keurig coffee maker, it is important to follow proper maintenance practices. Regular cleaning and descaling are crucial to prevent clogs and ensure the best coffee quality. We recommend cleaning your Keurig machine every three to six months, depending on usage frequency.
To clean your Keurig, start by unplugging the machine and allowing it to cool. Remove the water reservoir, drip tray, and pod holder, and wash them with hot water and a mild dish soap. Use a non-abrasive cloth or sponge to wipe down the exterior of the machine. It is also essential to descale your Keurig periodically to remove mineral deposits that can affect performance. Follow the manufacturer’s instructions or use a commercially available descaling solution.
Another important aspect of Keurig maintenance is taking care of the water pump and needle. Over time, these components can become clogged with coffee grounds and debris, affecting water flow and brewing efficiency. To maintain the water pump, clean it gently with a soft brush or a toothbrush. The needle, responsible for puncturing the coffee pod, should also be cleaned regularly to prevent clogs. You can use a paperclip or the Keurig needle maintenance tool to unclog and clean the needle.
Lastly, we recommend following these usage recommendations for a seamless brewing experience. Always use fresh, cold water in the water reservoir to ensure optimal taste. Avoid using distilled or softened water, as they can affect the flavor. Additionally, it is important to allow the machine to fully heat up before brewing your coffee. Pre-warming your mug with hot water can also help maintain the coffee’s temperature. Following these tips will help you maximize the performance of your Keurig coffee maker and ensure a consistently delicious cup of coffee every time.
FAQ
How can I fix a clogged Keurig?
Start by cleaning your Keurig with hot water and liquid dish soap. If needed, disassemble the machine for a more thorough cleaning.
How do I reset my Keurig?
Turn off the brewer, unplug it for a few minutes, remove the water reservoir, then plug the machine back in and reconnect the reservoir.
What are some common problems with Keurig coffee makers?
Some common issues include the machine turning on/off on its own, leaking, brewing too little coffee, having coffee taste issues, showing “Add More Water” error messages, not turning on, making weird noises, or not heating up properly.
Are there troubleshooting guides for specific Keurig models?
Yes, we provide troubleshooting guides for popular Keurig models such as the K-Mini, K-Supreme Plus, K-Slim, K-Cafe, and 2.0.
Do you have any recommendations for Keurig warranty and customer care?
It’s important to check your Keurig warranty and contact customer care if needed for assistance. We also discuss the options of repair vs. replacement and recommend Nespresso coffee makers as an alternative.
What are some additional tips for optimal Keurig performance?
Regular cleaning and descaling, as well as maintaining the water pump and needle, can prevent clogs and ensure coffee quality. We also provide usage recommendations for an enhanced brewing experience.
Leave a Reply